TASK 11: How to transfer funds to 3rd party outside UAE
HBZweb customer can remit funds to the third party account outside UAE with following easy steps.
STEP 1: Login to HBZweb
Browse to the HBZweb login page by typing URL: “https://online.habibbank.com/hPLUS” in the address bar or by clicking the “Login” button (appearing on the top-right corner, if you are on the HBZ UAE webpage).
Refer to task: How to Login to HBZweb for step-by-step detail on the login process.
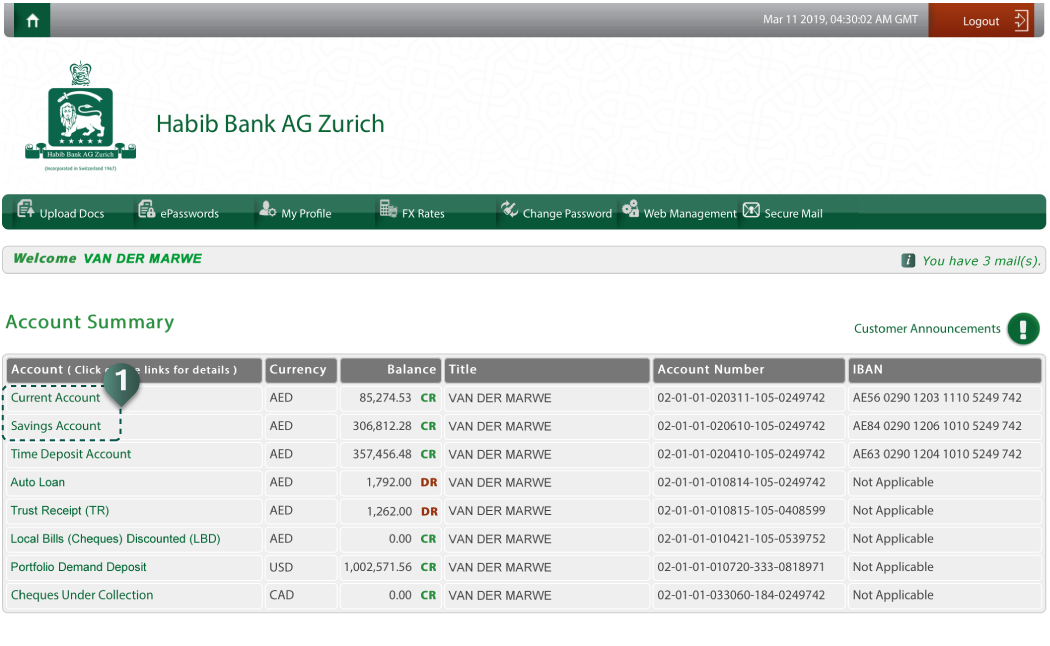
STEP 2: Select the appropriate account from the Account Summary screen
Select an appropriate account.
- Click the account from which the funds need to be transferred (i.e. account to be Debited).
STEP 3: Select the required option from the option list
Select required option.
- Select option titled “Fund Transfer (to Third Party)” through the list of options.
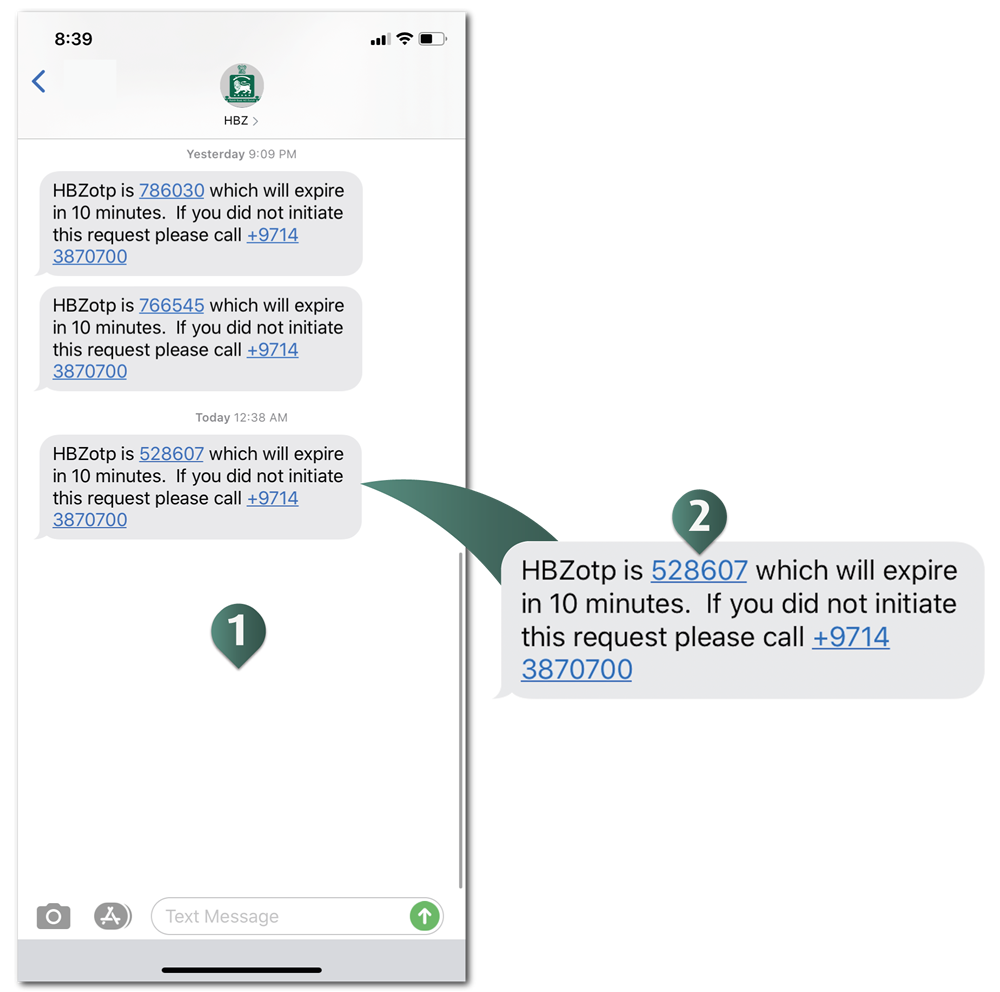
STEP 4: Access mobile to HBZotp code
Access to the message inbox under your registered mobile phone for HBZotp Code.
- Open the inbox messages on your registered mobile phone.
- Locate/Retrieve the HBZotp message.
STEP 5: Enter Online Transaction Password (OTP)
Enter HBZotp as detailed below:
- Enter OTP Code - Enter 6-digit OTP code, received on your registered mobile number.
- Submit HBZotp - Click the “Confirm” button to proceed further.
- Resend HBZotp (optional) - Click the “Resend Code” button in order to receive other code on your registered mobile number. NOTE: HBZotp is valid for only 10 minutes.
STEP 6: Select the transaction option
Select required transaction option to perform as follows:
- Select “Fund Transfer to Local HBZ Account” using a drop-down or a retrieve a saved template used for the similar transaction previously.
- Click the “Process” button, to enter transaction details on the next screen.
Optionally, you can;
- View & search for the previously saved template, by clicking the “Show Template Search” button and proceed with the advance search options to locate the appropriate template.
- Set a template display order, by clicking the “Set Alphabetical Ordering” button to rearrange the template listing in an sequential order for your convenience.
STEP 7: Enter transaction details
NOTE: In case of retrieving saved template, most of the information is auto-populated in the fields.
- Enter template name - This field appears in case if you want to store this transaction as a template, in order to use it in future to perform similar transactions. Note that the saving option is not available if you are already executing a transaction using a previously saved template. Any unique / first-time transaction is automatically saved as a template to be used in future.
- View charges - This field displays the charge amount in AED (if any), which is not editable.
- Select beneficiary’s country - Select country where the beneficiary’s account exists. Use drop-down option list to select required country.
- Enter beneficiary’s IBAN or Account number - Type in the IBAN (International Bank Identification Number) or Account number of the beneficiary in full (i.e. Account to be Credited).
- Enter beneficiary’s name/account title - Type in the name or account title of the beneficiary.
- Enter beneficiary’s address - Type in the complete address of the beneficiary.
- Enter SWIFT Code of beneficiary’s bank - Type in the SWIFT Code related to beneficiary’s bank to route the payment/remittance accurately.
- Enter any other identification code of beneficiary’s bank - Type in any alternate bank identification code such as Fedwire, Chips, etc. related to beneficiary’s bank to route the payment.
- Enter beneficiary’s bank name & address - Type in beneficiary’s bank name, branch and address details.
- Enter SWIFT Code of intermediary bank - Type in the SWIFT Code related to intermediary bank to be used to route payment to the beneficiary’s bank.
- Enter any other identification code of intermediary bank - Type in any alternate bank identification code such as Fedwire, Chips, etc. for intermediary bank to route the payment to beneficiary’s bank.
- Enter intermediary bank’s name & address - Type in intermediary bank’s name, branch and address details.
- Select currency of remittance - Select required currency for the remittance, using drop-down option list. (of currency)
- Enter the amount to be transferred - Type in the amount to be transferred/remitted (in currency selected) to the beneficiary.
- Re-enter the amount to be transferred - Type in the amount again, to be transferred, for confirmation purposes.
- Select the transaction type - Select the appropriate transaction type, using the drop-down option list with predefined transaction types.
- Enter purpose of payment - Type in the reason or purpose of the foreign remittance. This is crucial for compliance purposes.
- Specify if remittance is related to employee benefit - Tick mark the checkbox if the remittance is related to employee’s benefit such as Salary, Bonus, Allowance, Incentive, etc.
- Select payer for other bank charges - Select the party (sender or beneficiary), who will bear other bank’s charges. Use a drop-down option list to make appropriate selection.
- Execute transaction - Click “Save” button to submit the transaction for processing.
NOTE: Upon successful submission of the transaction, message “Your transaction has been completed successfully” will be prompted on the screen
|